![Neat Windows Defender Control v2.5 2025: Latest Version - Discover Neat Windows Defender Control Tool v2.5 (2025) to permanently disable Windows Defender in two easy steps. Safe, user-friendly, and effective for Windows 10/11. Learn how to use Neat Defender Control Tool v2.5 (2025) to disable Windows Defender permanently. This guide covers features, step-by-step instructions, and safety tips for Windows 10 and 11 users. Get […]](https://neatdownload.com/storage/2025/05/neat-windows-defender-control-v2.5-2025-latest-version-1.webp)
Discover Neat Windows Defender Control Tool v2.5 (2025) to permanently disable Windows Defender in two easy steps. Safe, user-friendly, and effective for Windows 10/11.
Learn how to use Neat Defender Control Tool v2.5 (2025) to disable Windows Defender permanently. This guide covers features, step-by-step instructions, and safety tips for Windows 10 and 11 users. Get the latest version and take control of your system security settings today.
Introduction to Neat Defender Control Tool v2.5
Neat Defender Control Tool v2.5 (2025) is a powerful utility designed to give Windows users full control over Windows Defender. you’re a professional needing to disable Defender for specific tasks, this tool simplifies the process with a user-friendly interface. Compatible with Windows 10 and 11, the latest version.
Why Choose Neat Defender Control Tool v2.5?
- Two-Step Disable Process: Disables Windows Defender permanently in just two steps.
- Tamper Protection Handling: Guides users to disable Tamper Protection before proceeding.
- Automatic Restart: Step 1 completion with an auto-restart feature.
- User-Friendly Interface: Intuitive design for beginners and advanced users.
- Windows 10/11 Compatibility: Optimized for the latest Windows versions.
- Safe and Reliable: Includes warnings to ensure users understand security implications.
How to Use Neat Defender Control Tool v2.5
Follow these steps to permanently disable Windows Defender using Neat Defender Control Tool v2.5. Ensure you understand the security risks before proceeding.
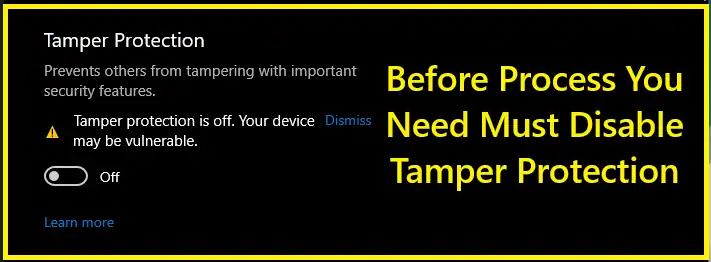
Step 1: Disable Tamper Protection
Windows Defender’s Tamper Protection must be disabled manually to allow changes. Here’s how:
- Open Windows Security from the Start menu.
- Navigate to Virus & Threat Protection >Manage Settings.
- Locate Tamper Protection and toggle it to Off.
- If prompted, click OK to open Windows Defender settings, or the tool will guide you.
Step 2: Run Step 1 of Neat Defender Control
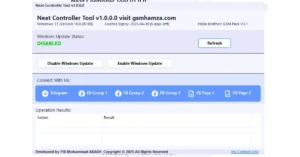
- Launch Neat Defender Control Tool v2.5 as an administrator.
- Click Step 1: Disable Defender on the main interface.
- Confirm the warning about security risks by clicking Yes.
- After completion, the tool saves progress and prompts for a system restart.
- Choose Yes for an automatic restart or restart manually later.

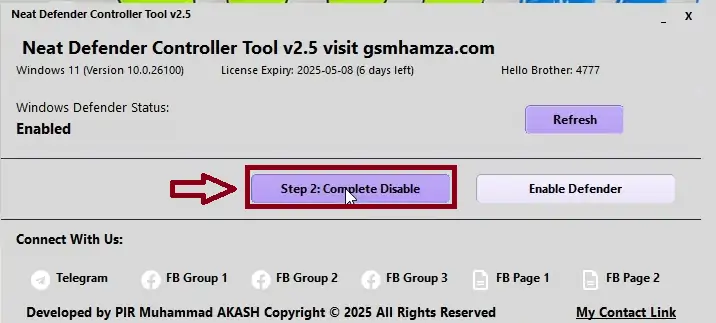
Step 3: Complete Step 2 After Restart
- Upon restart, Neat Defender Control Tool auto-launches.
- Click Step 2: Complete Disable to finalize the process.
- Confirm the final restart prompt to apply changes permanently.
- Enjoy! Windows Defender is now permanently disabled.
Watch Guide Video How To Use Neat Windows Defender Control v2.5

Safety Tips Before Disabling Windows Defender
Disabling Windows Defender can expose your system to malware risks. Consider these precautions:
- Install Alternative Antivirus: Use a trusted third-party antivirus before disabling Defender.
- Backup Your Data: Ensure critical files are backed up to prevent data loss.
- Understand Risks: Only disable Defender if necessary for specific software or tasks.
- Re-Enable Option: The tool allows re-enabling Defender if needed via the Enable Defender button.

Table of Contents
- Introduction to Neat Defender Control Tool v2.5
- Why Choose Neat Defender Control Tool v2.5?
- How to Use Neat Defender Control Tool v2.5
- Step 1: Disable Tamper Protection
- Step 2: Run Step 1 of Neat Defender Control
- Step 3: Complete Step 2 After Restart
- Watch Guide Video How To Use Neat Windows Defender Control v2.5
- Safety Tips Before Disabling Windows Defender